Collections let you group places by theme or category. A single place can belong to multiple collections. Visitors can click on a collection button to filter the map and list, making it easy to explore specific types of places.

-
Sign in and navigate to your community
Navigate to the community where you want to create a collection. You must be the owner or a moderator of the community to create collections.
-
Click the Manage button
The Manage button only appears if you are signed in and are the owner or moderator of the community.

-
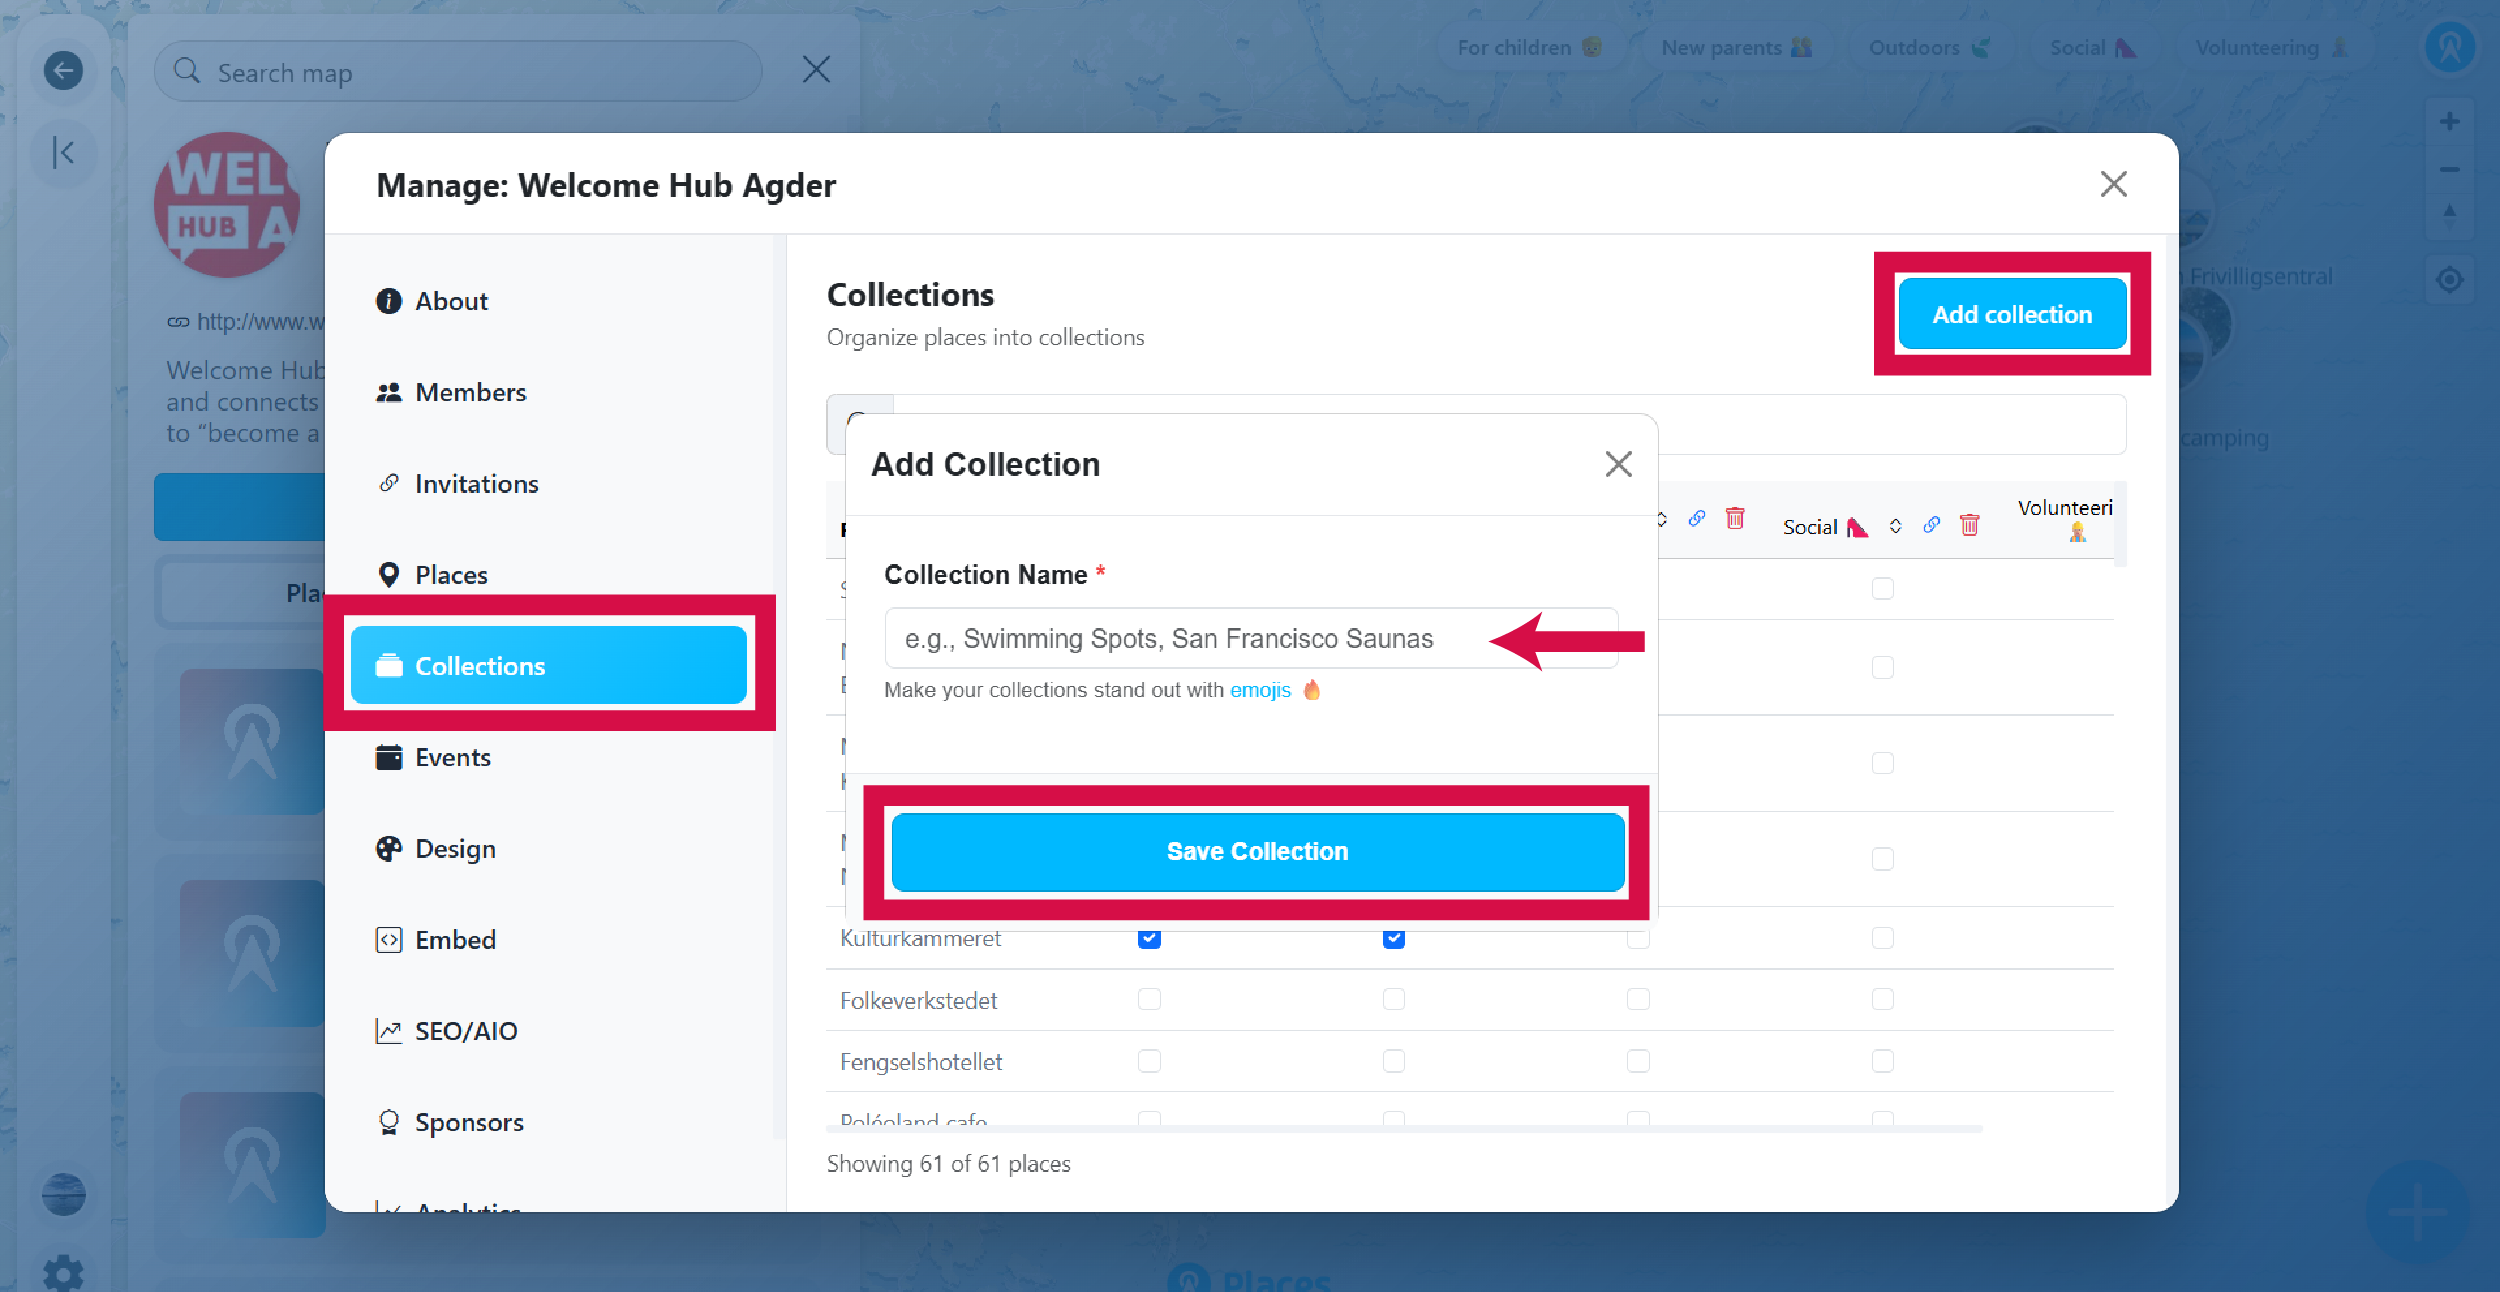
Create a new collection
Go to the Collections section in the Manage panel. Here you can create and manage your collections.
- Click the Add collection button.
- Enter a name for your collection (e.g., "Swimming Spots", "Best Cafes").
- Click Save Collection.
You can edit the collection name later if needed.
-
Add places to your collection
After creating a collection, a table appears showing all places in your community with checkboxes for each collection.
- Find the place you want to add in the table.
- Check the box under the collection column to include that place.
- A place can belong to multiple collections—just check multiple boxes.

-
View your collection
Changes are saved automatically—no need to click a save button. Simply refresh your page to see the collection in action.
- Collection buttons appear at the top right of your map.
- Visitors can click a collection to filter and see only places in that collection.
- Collections can also be embedded separately on other websites.