Feature organizations that support your community. Sponsor logos appear at the bottom of your community map, with optional links to their websites.
-
Sign in and navigate to your community
Navigate to the community where you want to add sponsors. You must be the owner or a moderator of the community to manage sponsors.
-
Click the Manage button
The Manage button only appears if you are signed in and are the owner or moderator of the community.

-
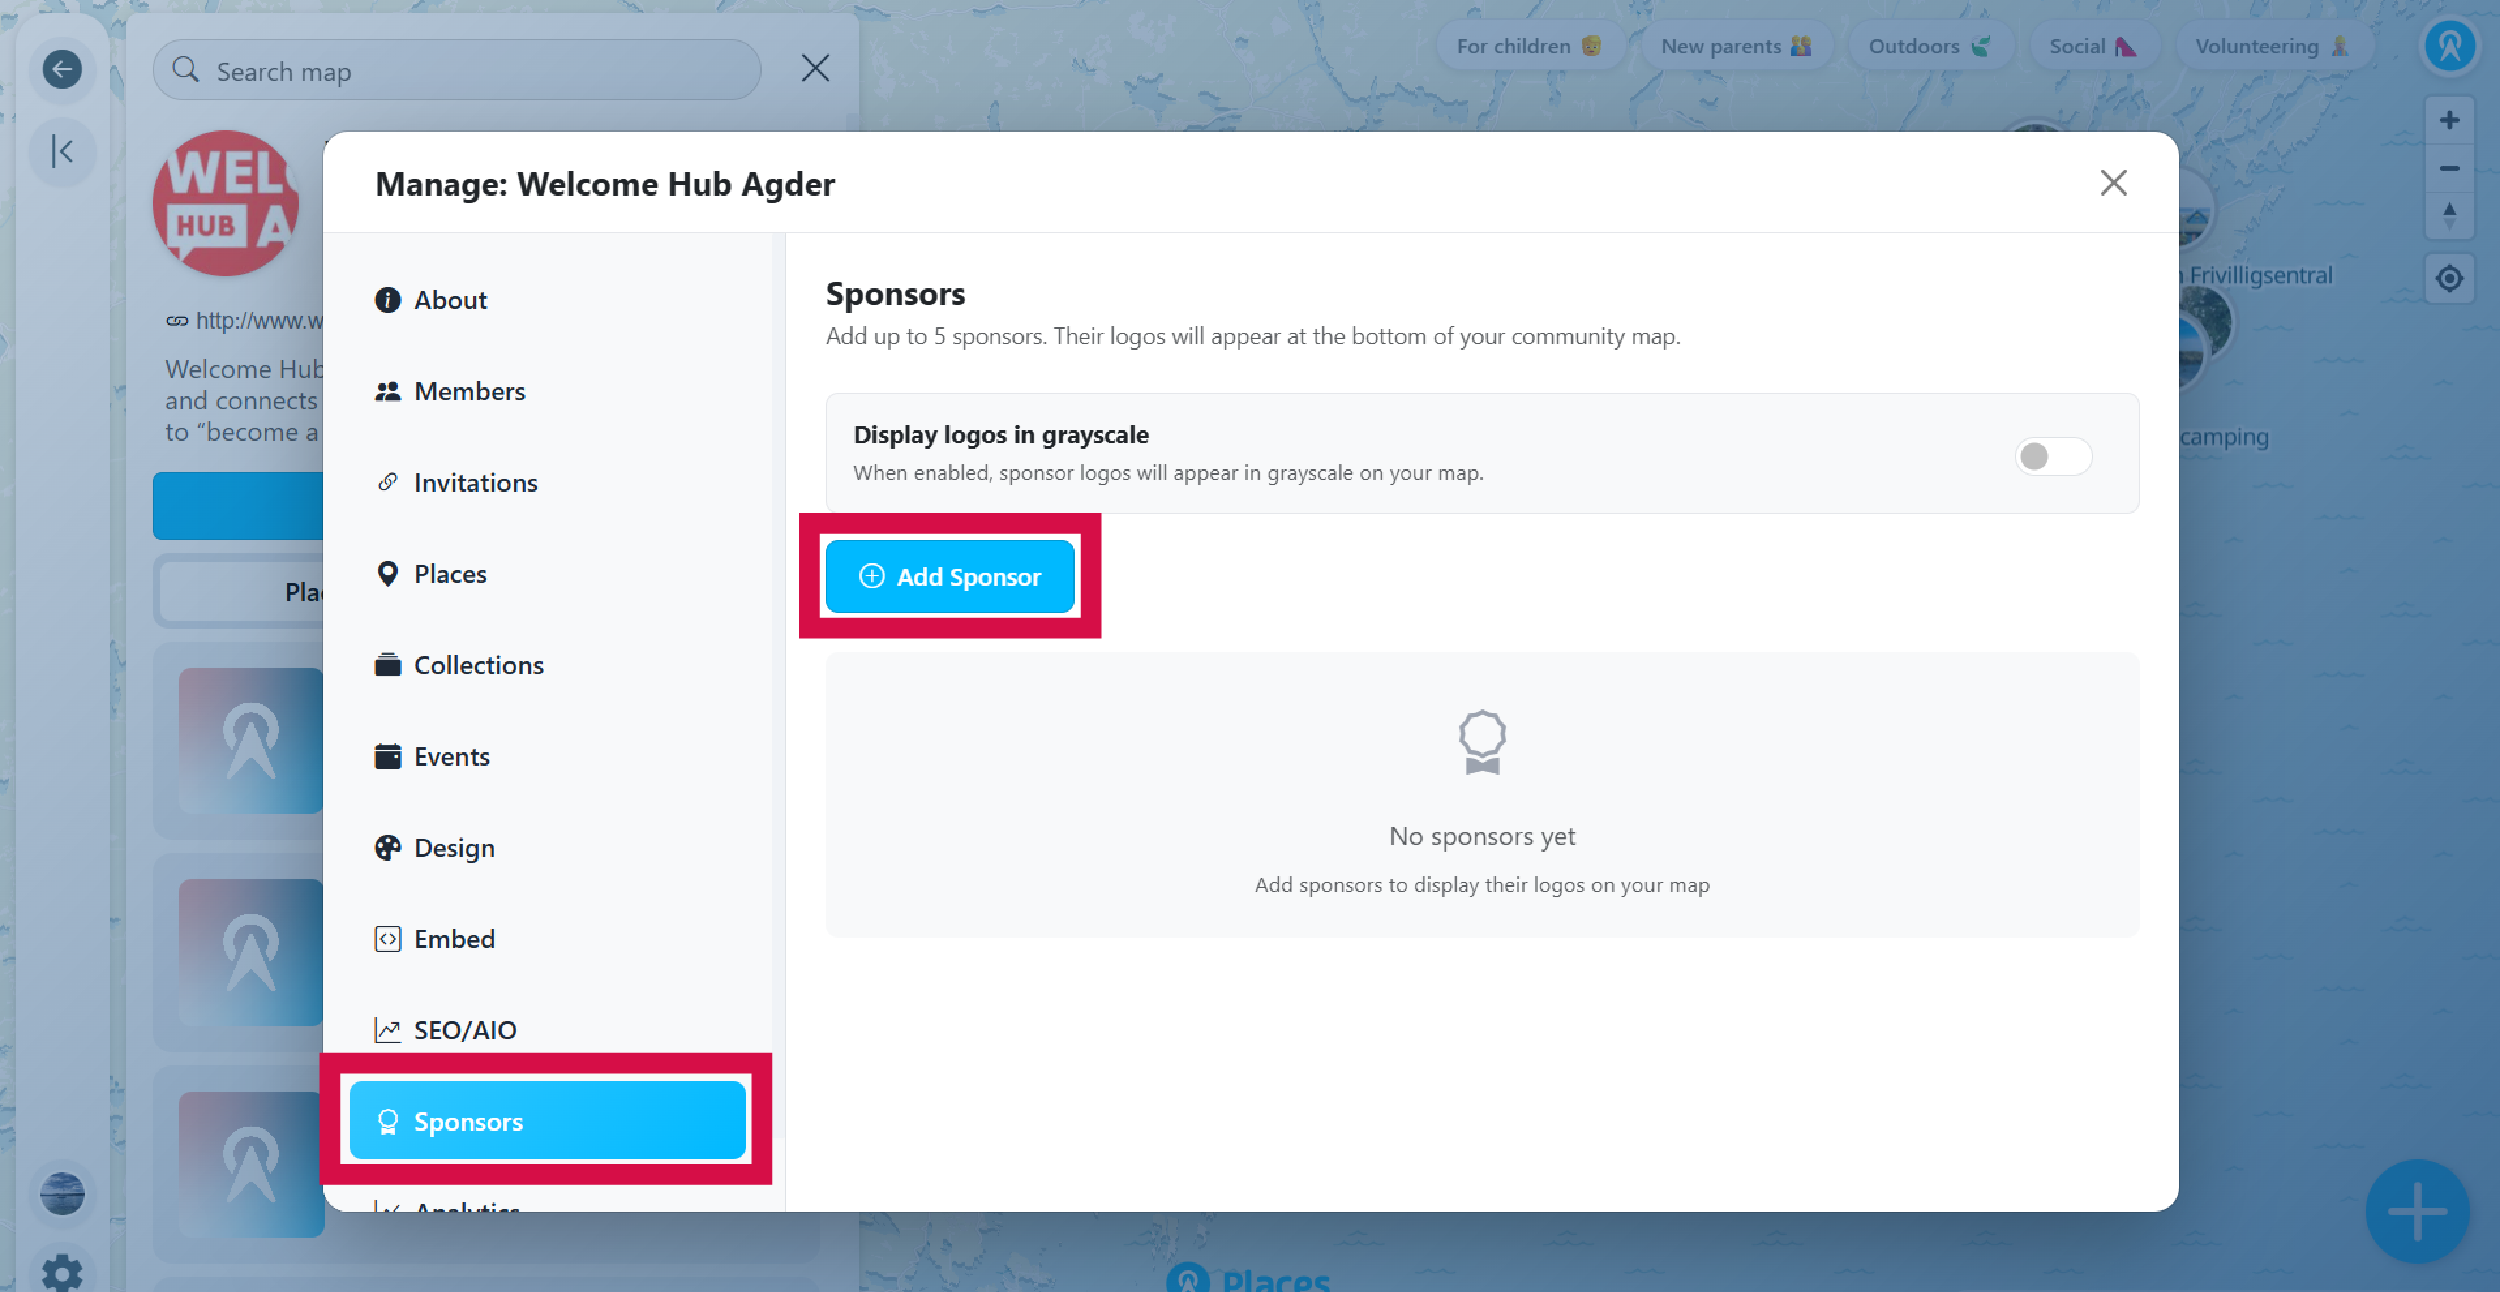
Go to the Sponsors section
Navigate to the Sponsors section in the Manage panel. Here you can add and manage sponsor logos for your community.
-
Add a sponsor
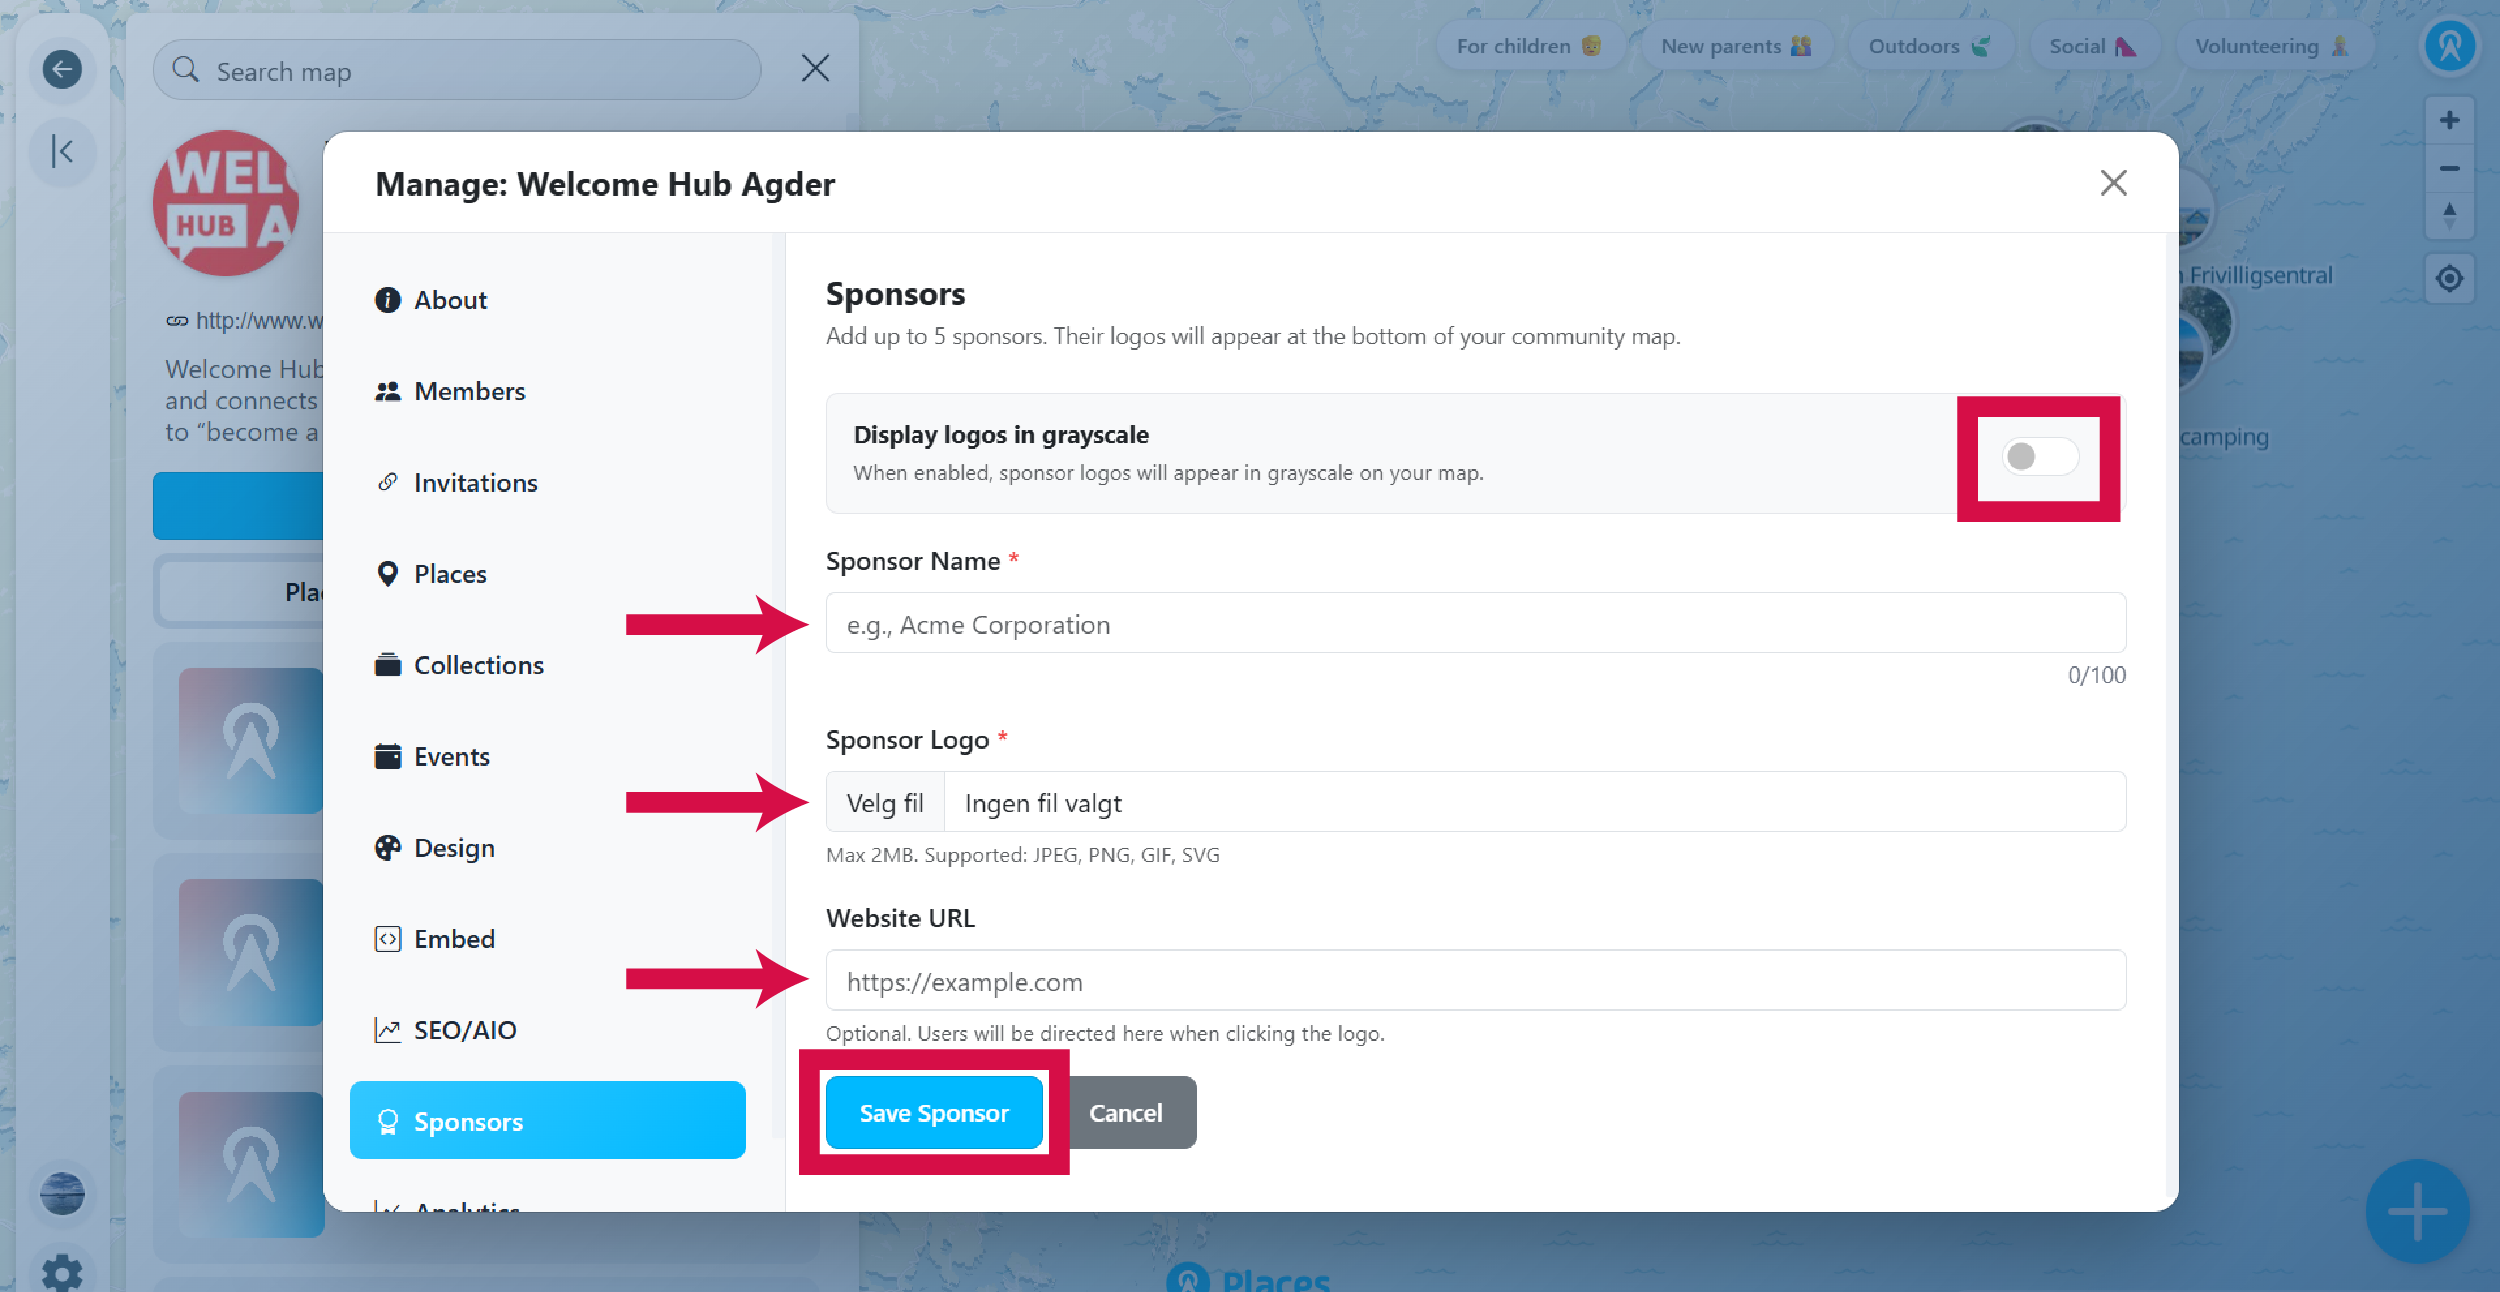
Click the Add Sponsor button and fill in the sponsor details:
- Sponsor Name (required) - The sponsor's organization or company name.
- Sponsor Logo (required) - Upload the sponsor's logo. Max 2MB, supports JPEG, PNG, GIF, SVG.
- Website URL (optional) - Visitors will be directed here when clicking the logo.
Click Save Sponsor to add them. You can add up to 10 sponsors per community.
You can also toggle Display logos in grayscale if you want all sponsor logos to appear in grayscale. This can help logos blend better with your map design.
-
View your sponsors
Sponsor logos appear at the center bottom of your map. Visitors can click on a logo to visit the sponsor's website (if a URL was provided).